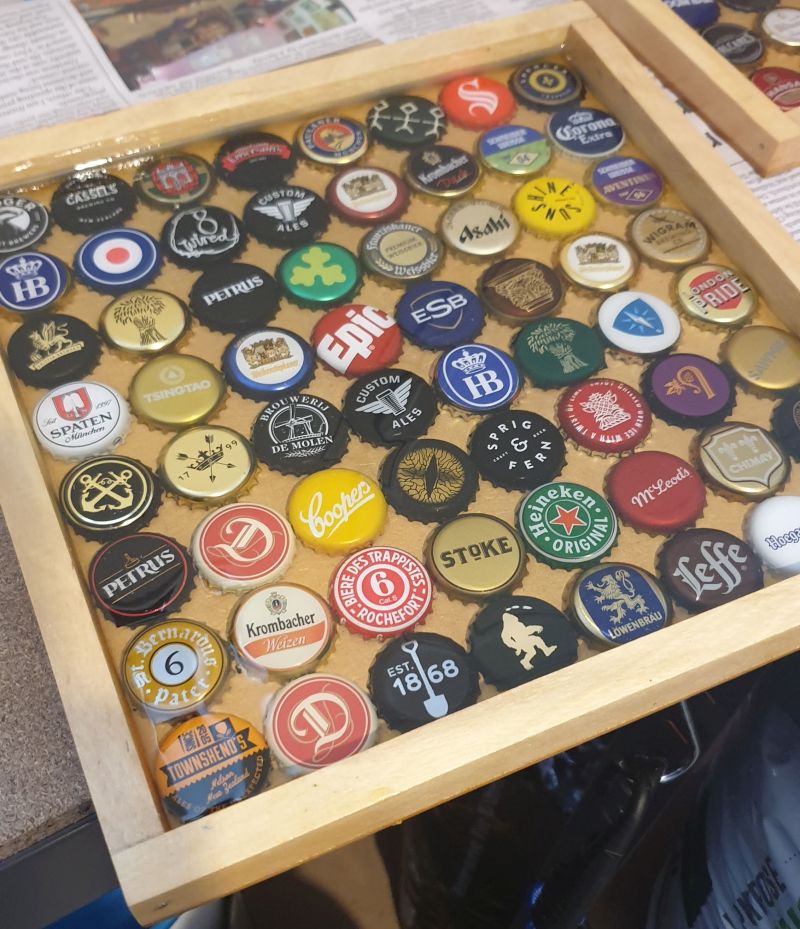
Beer Crown Epoxy Frame
I have been collecting beer crowns for many years, with the idea of creating a frame to display them.
So, after years I finally started the project.
I signed up for a Adult Woodworking Beginners course at the Papanui High School.
I completed the Beginners course (I made a tea tray!)
Then I signed up for the advanced course where you are allowed to do your own project. So I started drawing and googling.
Concept
Create a wooden frame that will hold rows of beer crowns. Cover the crowns with epoxy. Preferably 10 X 10 crowns.
This was the first version. It was a bit smaller, due to repeated miscalculation on my side.

Requirements
- 100 crowns. You will probably not need all of them, but you should have enough to ensure that the frame will not be half empty
- Enough wood to cut the frames. Do not use compressed wood
- A base piece (295mm X 295mm)
- An epoxy resin, approximately 200ml per frame. I used the Norski Epoxy Doming Resin (for a glass like finish)
Dimensions
Crowns
Because the crowns are slightly bent during opening, the measurements are approximate.
| Description | Measurement |
|---|---|
| Height | ~ 6.5mm |
| Width | ~ 27mm |
Frame
| Description | Measurement |
|---|---|
| Total Height | 290mm |
| Total Width | 290mm |
| Total Depth | 23mm |
| Inner Height & Width | 270mm |
| Inner Height & Width | 270mm |
| Inner Depth | 20mm |
| Frame (border) Height | 280mm |
| Frame (border) Width | 10mm |
| Frame (border) Depth | 20mm |
| Base board Height | 290mm |
| Base board Width | 290mm |
| Base board Depth | 3mm |
Frame Instructions
- Cut and clean all the pieces
- Use painters tape to assemble the frame and confirm that the crowns will fit. Remember that the varnish will use up a bit of the space, so do not make it too tight
- Nail the frame together
- Nail the base board to the frame
- Varnish and leave to dry (two layers)
Crowns and epoxy
As there is not a lot of buffer, it is very important that you confirm that your crowns will fit into the frame before you stick anything down.
- Place all the crowns in the frame to ensure it all fits. Ensure that the crowns are flat and do not push against each other
- Remove crowns and clean the crowns and the frame
- Mix 75ml of epoxy and add it to the frame. Ensure that all the whole base is covered
- Insert the crowns into the frame
- If there are any large bubbles visible, blow on the bubble1 or use a blow-torch to burst the bubble2
- Cover the frame with something that will not lie on the crowns/epoxy
- Leave the epoxy to set for 24 hours. Check up on the epoxy every hour or two for the first 12 hours, making sure that there are no new bubbles
- Cover the crowns with at least 2mm of epoxy
- If there are any large bubbles visible, blow on the bubble1 or use a blow-torch to burst the bubble2
- Cover the frame with something that will not lie on the crowns/epoxy
- Leave the epoxy to set for 24 hours. Check up on the epoxy every hour or two for the first 12 hours, making sure that there are no new bubbles
Other notes
For the first frame I used superglue to stick the crowns to the base. This does work, but it is very labour intensive, you will have superglue on your fingers and you will have the potential problem where the stuck crowns do not allow you any movement buffer. You will also use a lot more superglue than you think.
-
CO2 in your breath will cause the bubbles to burst, you can also use a hairdryer with the heat turned off. ↩︎ ↩︎
-
Just do a quick move over the crowns. Do not hold the blow-torch too long, as you will either cause more bubbles to come out from under the crowns, or you will burn the crown’s paint or the frame. ↩︎ ↩︎

